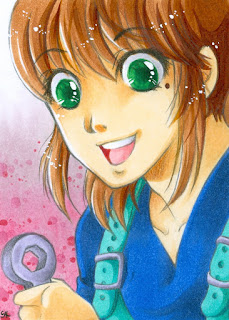
Again: German *_____*
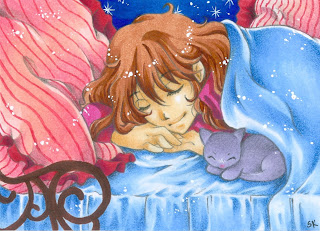
Auf der LBM werdet ihr neben Originalkakaos auch ein Auflagenset kaufen können und zwar zu meinen eigenen Charas. Minu kennt ihr vielleicht schon von einigen meiner Artworks und ich arbeite gerade an eiem Kurzmanga zu ihr, von dem ich euch hoffentlich nächste Woche schon ein paar Seiten präsentieren kann.
Die ersten beiden karten des Sets seht ihr hier. Links ist Minu zu sehen und rechts ihre beste Freundin, aber mehr wird noch nicht verraten.
Dieses Blog durchsuchen
Mittwoch, 22. Februar 2012
Sonntag, 19. Februar 2012
Tutorial Step 2 and 3
Okay, after several days of a terrible cold (I really hate being sick! It effects you in such a strong way!) here comes the next step of the tutorial:After the light blue sketch I do the real sketch with an ordinary pencil. But this size is still A4 and, as I already told you, I want the final original to be in A3. So now I enlarge the sketch to A3 and transfer it from an ordinary sheet of paper to water colour paper. Et voilá, the second step is done. Although it sounds that easy it's quite unnerving becuase by now I've made the sketch at least four times.
Before I finally start with the colouring I prepare my work place. I use no special water colours but basically everything I have.
As you can see, my sketches are always very light. Sometimes I use ink when working with water colours, but I want the colours to be really vibrant and more natural so I do the outlines only with a pencil. After that I use a water colour pencil for the first layer of skin. When I work like this the area I'm working on always has to be wet to make the colours smooth. The lighter the colours the more water I use, the darker the less. So I work until I'm satisfied with the area, which does not mean that I am completely satisfied, I will always make adjustments while I'm working. But this is basically step 3.
Dienstag, 7. Februar 2012
New live tutorial
Okay, as promised, here comes my new live tutorial. After the disaster with the HP-Mac-incompatability I will try to do it completely without my Macbook and simply use my really old (9 years) Laptop. For this tutorial I will also try something I haven't done for a long time, so it will be a real challenge - and maybe it won't work out at all oO. But let's first see the picture I want to do:Tataa!! *__________* Yeah, I know, you can't see anything, but that's because I usually use a light blue, erasable pencil for the first sketch and my sketches are really light. Sometimes I have problems recognizing anything myself. So here is a processed version which allows you to see the sketch:
I want to finish it for my father's birthday (which is around the middle/end of February). He loves nature, so I added a lot of flowers and I hope it will be really colourful. In my imagination it already looks magnificent- but, well, that's my imagination and a lot of things are happening there that never come true in real life. The next step will be to transfer the outlines from this size,which is A4, to a bigger size because I want the original to be in A3. How that works I'll show you in the next step.
Abonnieren
Posts (Atom)